
The board and keeping your balance
Parts of the wing, leash and foil

Inflating your wing and leaving your equipment

Read the words in the picture
The board and keeping your balance
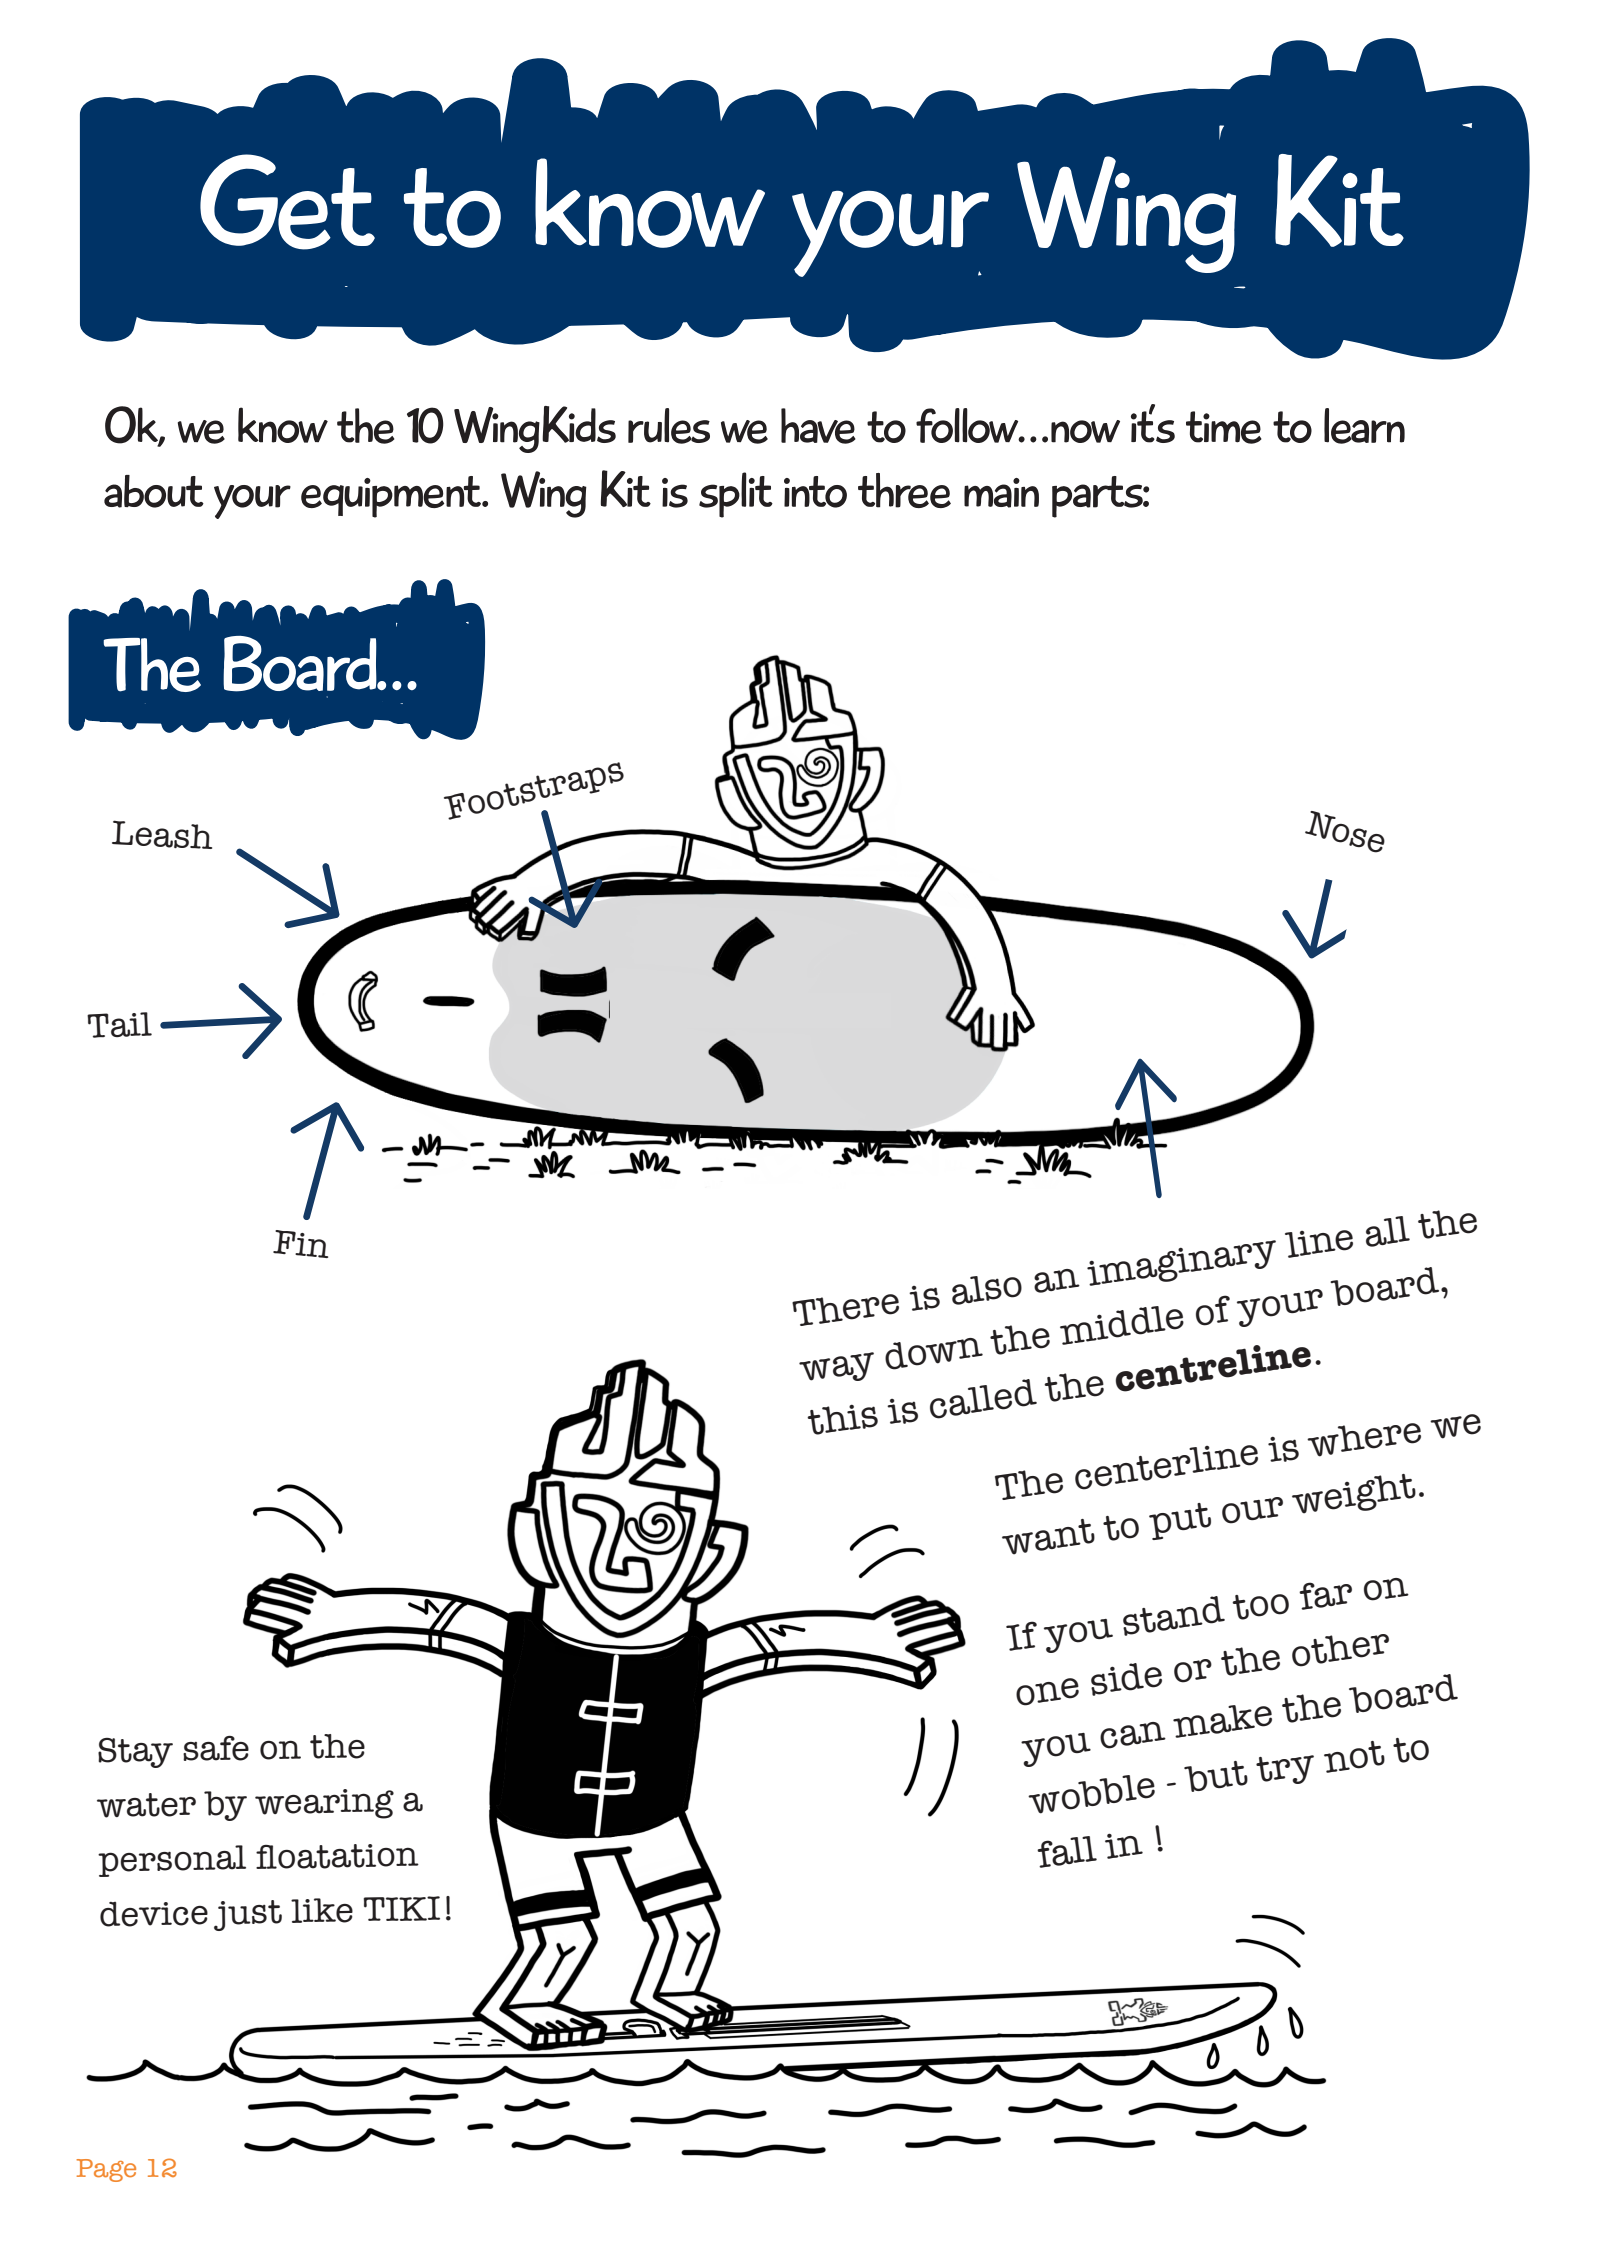
- Get to know your Wing Kit
- Ok, we know the 10 WingKids rules we have to follow… now it's time to learn about your equipment. Wing Kit is split into three main parts:
- The Board...
- Leash
- Footstraps
- Nose
- Tail
- Fin
- There is also an imaginary line all the way down the middle of your board, this is called the centreline.
- The centerline is where we want to put our weight.
- If you stand too far on one side or the other you can make the board wobble - but try not to fall in!
- Stay safe on the water by wearing a personal floatation device just like TIKI!
- Page 12
Parts of the wing, leash and foil
- ...The Wing...
- Leading Edge
- Canopy
- Neutral Handle
- We hold the neutral handle to gain control of the wing, and so we can work out which way the wind is blowing.
- Trailing Edge
- Center Strut
- Power Handles
- Window
- The Leash is the most important part of your wing kit... It connects you to your wing so that it can't blow away!
- There are 2 types of leash:
- A waist leash...
- ...And a wrist leash
- ...And the Foil
- Tail Wing
- Front Wing
- Winging with a foil lets you fly super fast above the water.
- Once you have nailed the skills in this workbook you will be ready to try foiling!
Inflating your wing and leaving your equipment
- Inflating Your Wing
- Before you start inflating your wing, make sure you attach your leash - you don't want your wing to blow away!
- Next up, attach your pump nozzle into the inflation valve and get pumping.
- Keep pumping until the needle on your pump points to about 6 PSI.
- PSI is the unit we use for measuring pressure.
- Not enough pressure and your wing will be floppy, but if you pump too much it could pop like a balloon!
- Once you have inflated the leading edge you can detach the pump, do up the valve and move on to the center strut.
- Leaving your equipment
- If we're not winging we need to make sure our kit is safe and secure on the beach.
- Lie the wing upside down on the beach and make sure it is downwind of your board (this means that the wind hits the board first and then the wing).
- You can rest your board on the leading edge of the wing to stop it blowing away or you can attach your leash to your foil or footstraps.
- The wind is blowing this way!
- Page 14
Knowing the names makes your gear easier to understand
When you watch someone winging from far away, the first things you notice are the wing in their hands and the board under their feet. WingKids splits the gear into three main parts: the board, the wing and the foil. That doesn't mean you have to handle all three well from day one. The workbook suggests an order where you learn the basic moves first, and that leads to getting ready to learn the foil.
The board drawing marks the nose at the front, the tail at the back, the fin, the footstraps and the leash. The imaginary line running down the middle is the centreline. If you put too much of your weight on one side, the board can wobble, so this line helps you understand where to stand or put your knees. Also look for the personal floatation device TIKI is wearing in the picture.
On the wing, the names of the handles really matter. The neutral handle at the front and the power handles underneath are used at different times. The leash connects you to the wing so it can't blow away, and the workbook shows a wrist leash and a waist leash. The activity below is time to learn the names and jobs of each part before you get real gear ready.
Let's try it together
Find the board's centreline and the parts around it
Point to the front and back of the board in the drawing, and trace a line down the middle with your finger. The centreline isn't always printed on a board. It's an imaginary line that helps you understand where things are. Find the footstraps, fin and leash too, and say their names. If a real board looks different from the drawing, don't assume every part is the same. Ask your instructor what's on the gear you'll use today.
Tell apart the front of the wing and its handles
The front edge that meets the wind first is the leading edge, and the back edge is the trailing edge. The wide fabric part is the canopy, and the tube in the middle is the center strut. Find where the neutral handle and the front and back power handles are attached. In the picture, check the workbook's order: use the neutral handle to control the wing and work out the wind direction, then learn the power handles.
Check the connection before you pump
The order is to attach the leash so the wing can't blow away, then use the pump. PSI on the gauge is a unit for air pressure, and too little or too much air can cause problems with the gear. Don't use the example number in the picture for every wing. Check the real product's recommended pressure with a grown-up. Learn how to open and close the valves, and how the tubes are set up, for the gear you actually use.
Take care of your gear during breaks too
Even when you put the wing down, the wind keeps blowing. On the beach, you need to secure your gear safely, thinking about which way the wind is blowing. In the picture, find the side the wind reaches first and the side behind it, and look at what's nearby in case the gear moves. Leave the real way of securing it to your instructor to check. For the foil, start just by learning the names of the front wing and tail wing.
Let’s talk
What do you think?
- How could telling the neutral handle and the power handles apart by name help you in a lesson?
- Why do you still need to check the wind direction while you're not using your wing?
Where the pictures and activities come from
WingKids workbook p. 12 ↗ · p. 13 ↗ · p. 14 ↗
The pictures are pages from the original workbook. The steps and questions below are Starboard Korea’s notes to help families use them together.
Save the original workbook ↓