1 / 2 · Attaching the leash

2 / 2 · Leash types

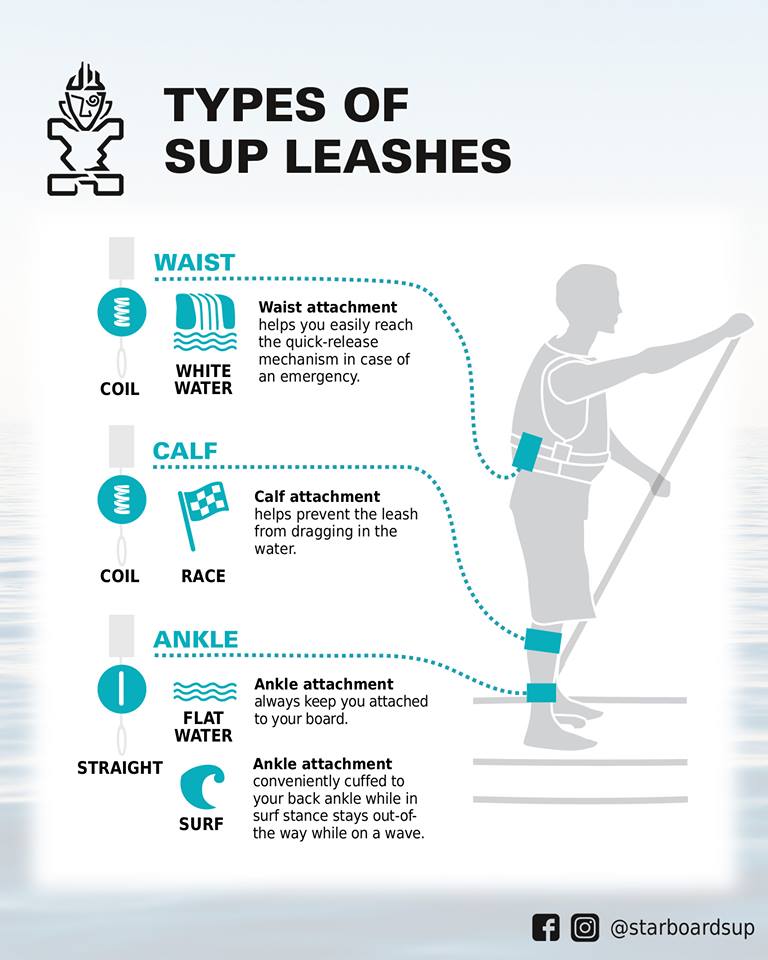
When choosing a leash, check whether the water is moving and whether there's anything to snag on, as well as the sport categories in the picture. Let's look below at how to choose according to the water.
The leash connects you to your board. It's a small piece of gear, but one you should always check before you head out. Along with attaching it properly, let's build the habit of checking that it's the right leash for where you're riding today.
01. Think about where you'll ride first
Even the leash that came with your board isn't right for every place. In water with flow or currents and a risk of snagging on obstacles, you need a quick-release waist leash.
What matters here isn't simply that it's worn around the waist, but that it has a release you can open by hand when you need to. Learn and practice choosing the right one for the water, and how to actually release it, with an instructor. Don't use an ankle leash as-is on every river and stream.
02. Attaching with a D-ring and loop
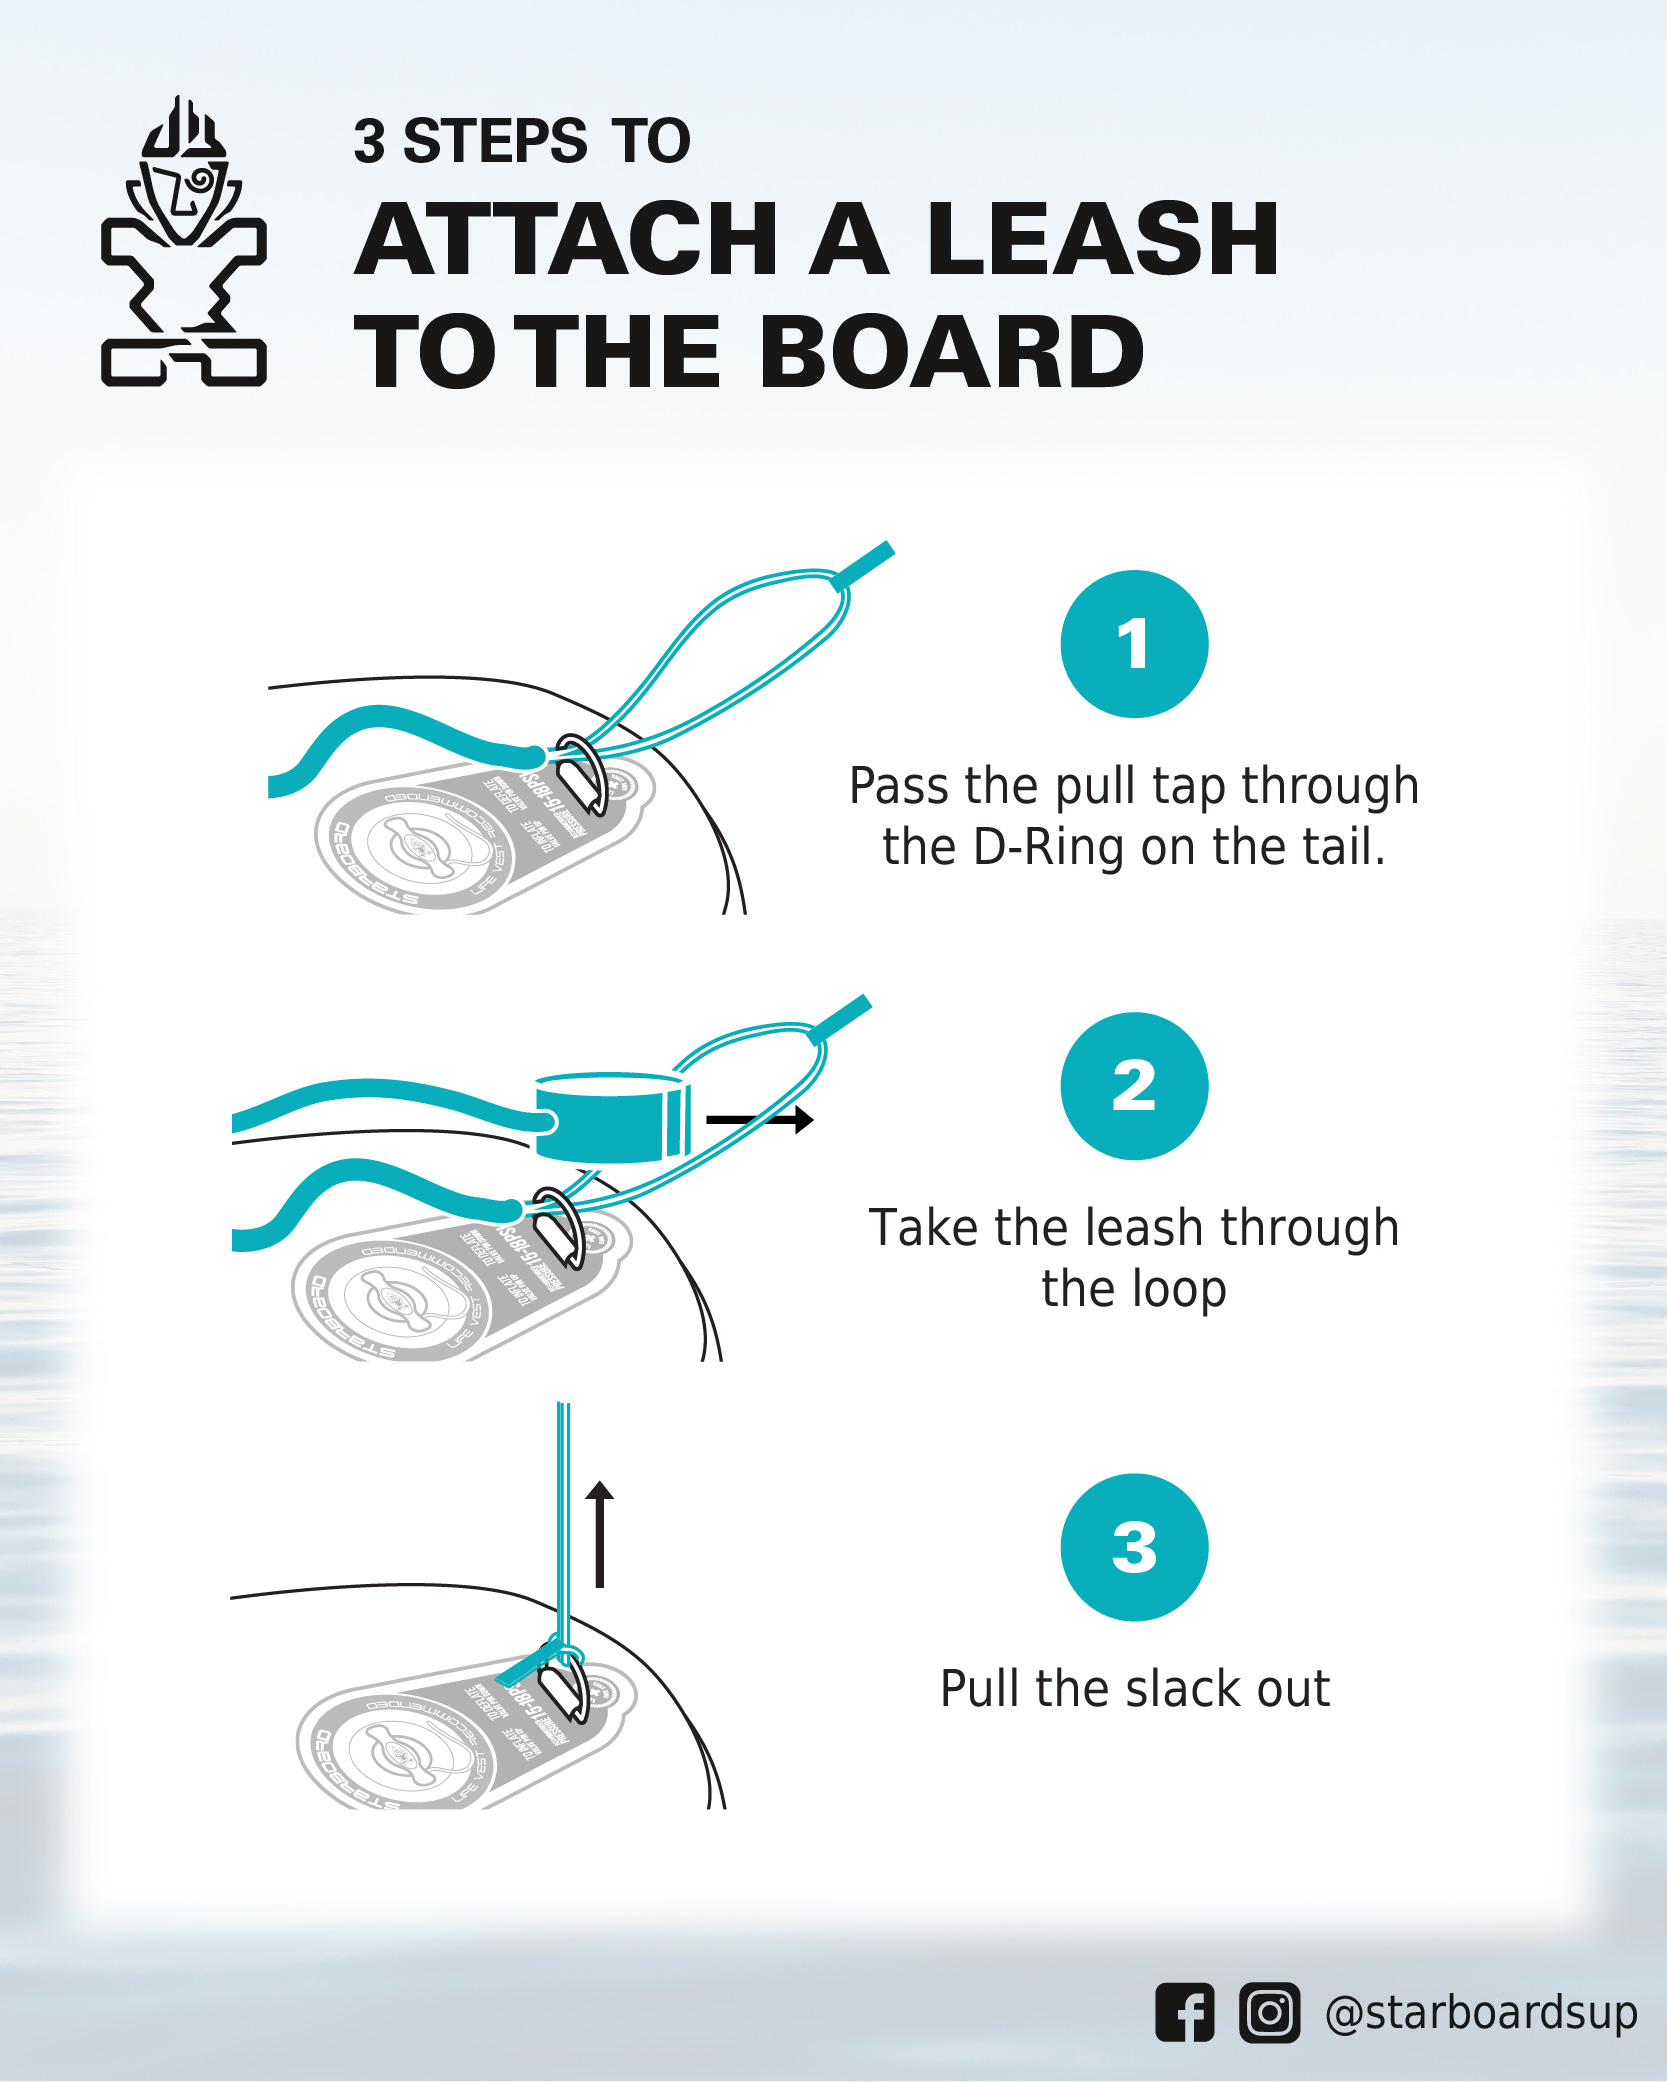
If your tail has a D-ring and your leash ends in a loop, as in the picture, attach it in the order below. Put the loop through the D-ring, pass the leash through the loop, then pull it snug.
If you use a different attachment point instead of a D-ring, or a Velcro type, don't force the same steps. Just check the attachment instructions for your board and leash.
- Put the loop through the D-ring on the tail
- Pass the leash through the loop
- Pull the slack through to tidy up the connection
03. Check it by hand before you go in
Check the cord for splits or heavy wear, and check that the cuff you wear and the attachment point aren't damaged. Also check that the Velcro or locking parts are properly closed.
Check the connection with your own hands, and find the release again. If sand or debris gets in the way of the lock, clear it first. If you find any damage, it's best to stop using it and get it replaced or checked.
04. Prepare your leash and buoyancy gear together
A leash helps reduce the chance of getting separated from your board when you fall. But neither the leash nor the board replaces buoyancy gear that fits you. Wear gear suited to the activity and your body as well.
Before you head out, run through these once: “Is it the right type for the water? Is it attached properly? Do I know how to release it?” If any of them is unclear, that's your cue to check before you go in.
Sources and scope
The illustrations are Starboard HQ's two original infographics on attaching a leash and on leash types; the explanation is Starboard Korea's commentary. The attachment diagram applies only to a tail D-ring with a loop connector. The sport-by-sport categories in the types illustration are as in the original and don't replace choosing safely for the water you're on. Guidance on quick-release waist leashes for moving water, currents and snag hazards, and on suitable buoyancy gear, was added to the commentary after checking the RNLI's official SUP safety page on 2026-09-08.
- Starboard · Attaching a leash in 3 steps ↗
- Starboard · Types of SUP leash ↗
- Starboard · Why use a leash ↗
- RNLI · SUP safety and choosing the right leash for the water ↗
The illustration is Starboard's original artwork; the explanation is Starboard Korea's editorial guide, translated into English here. Sources checked: 2026-09-08.