1 / 6 · Attaching the leash

2 / 6 · Preparing the valves

3 / 6 · Inflating

4 / 6 · Deflating

5 / 6 · Folding in half

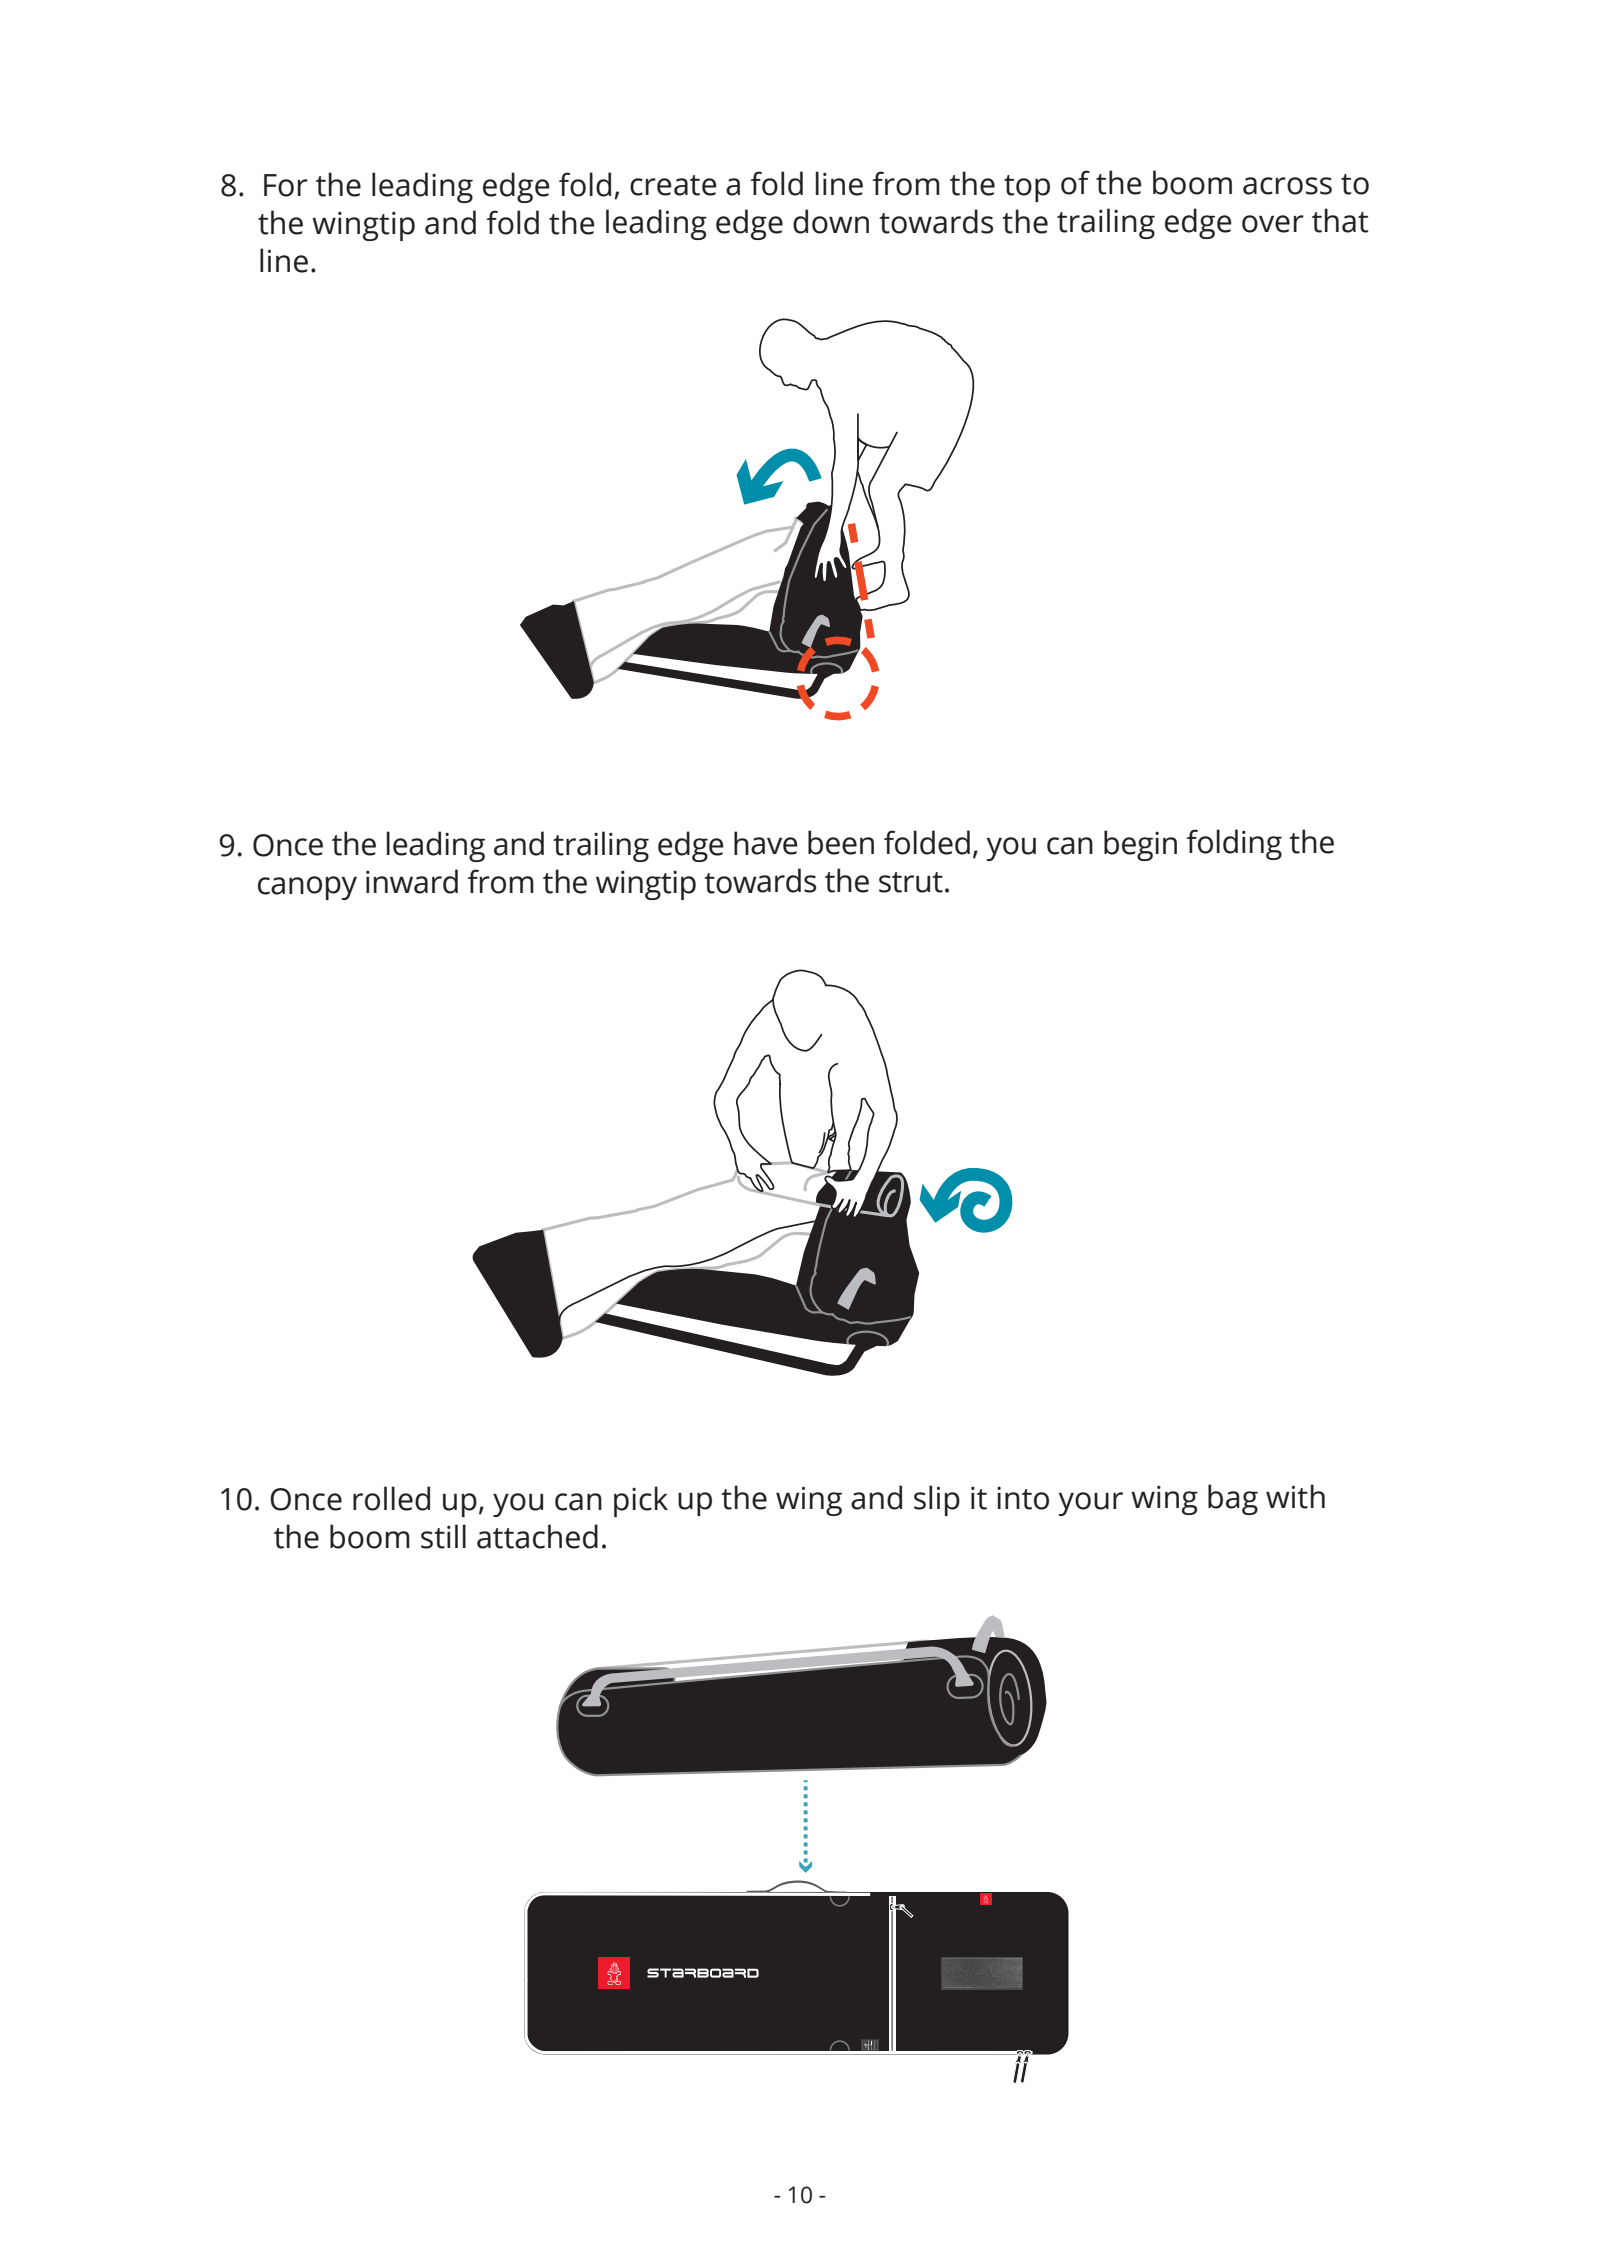
6 / 6 · Rolling it up into the bag

When you lay out a new wing, you want to start pumping right away. Hold on a moment. If you first learn the order of looking around, securing the wing and checking the valves, getting ready becomes much calmer.
01. Secure the wing first so it doesn't blow away
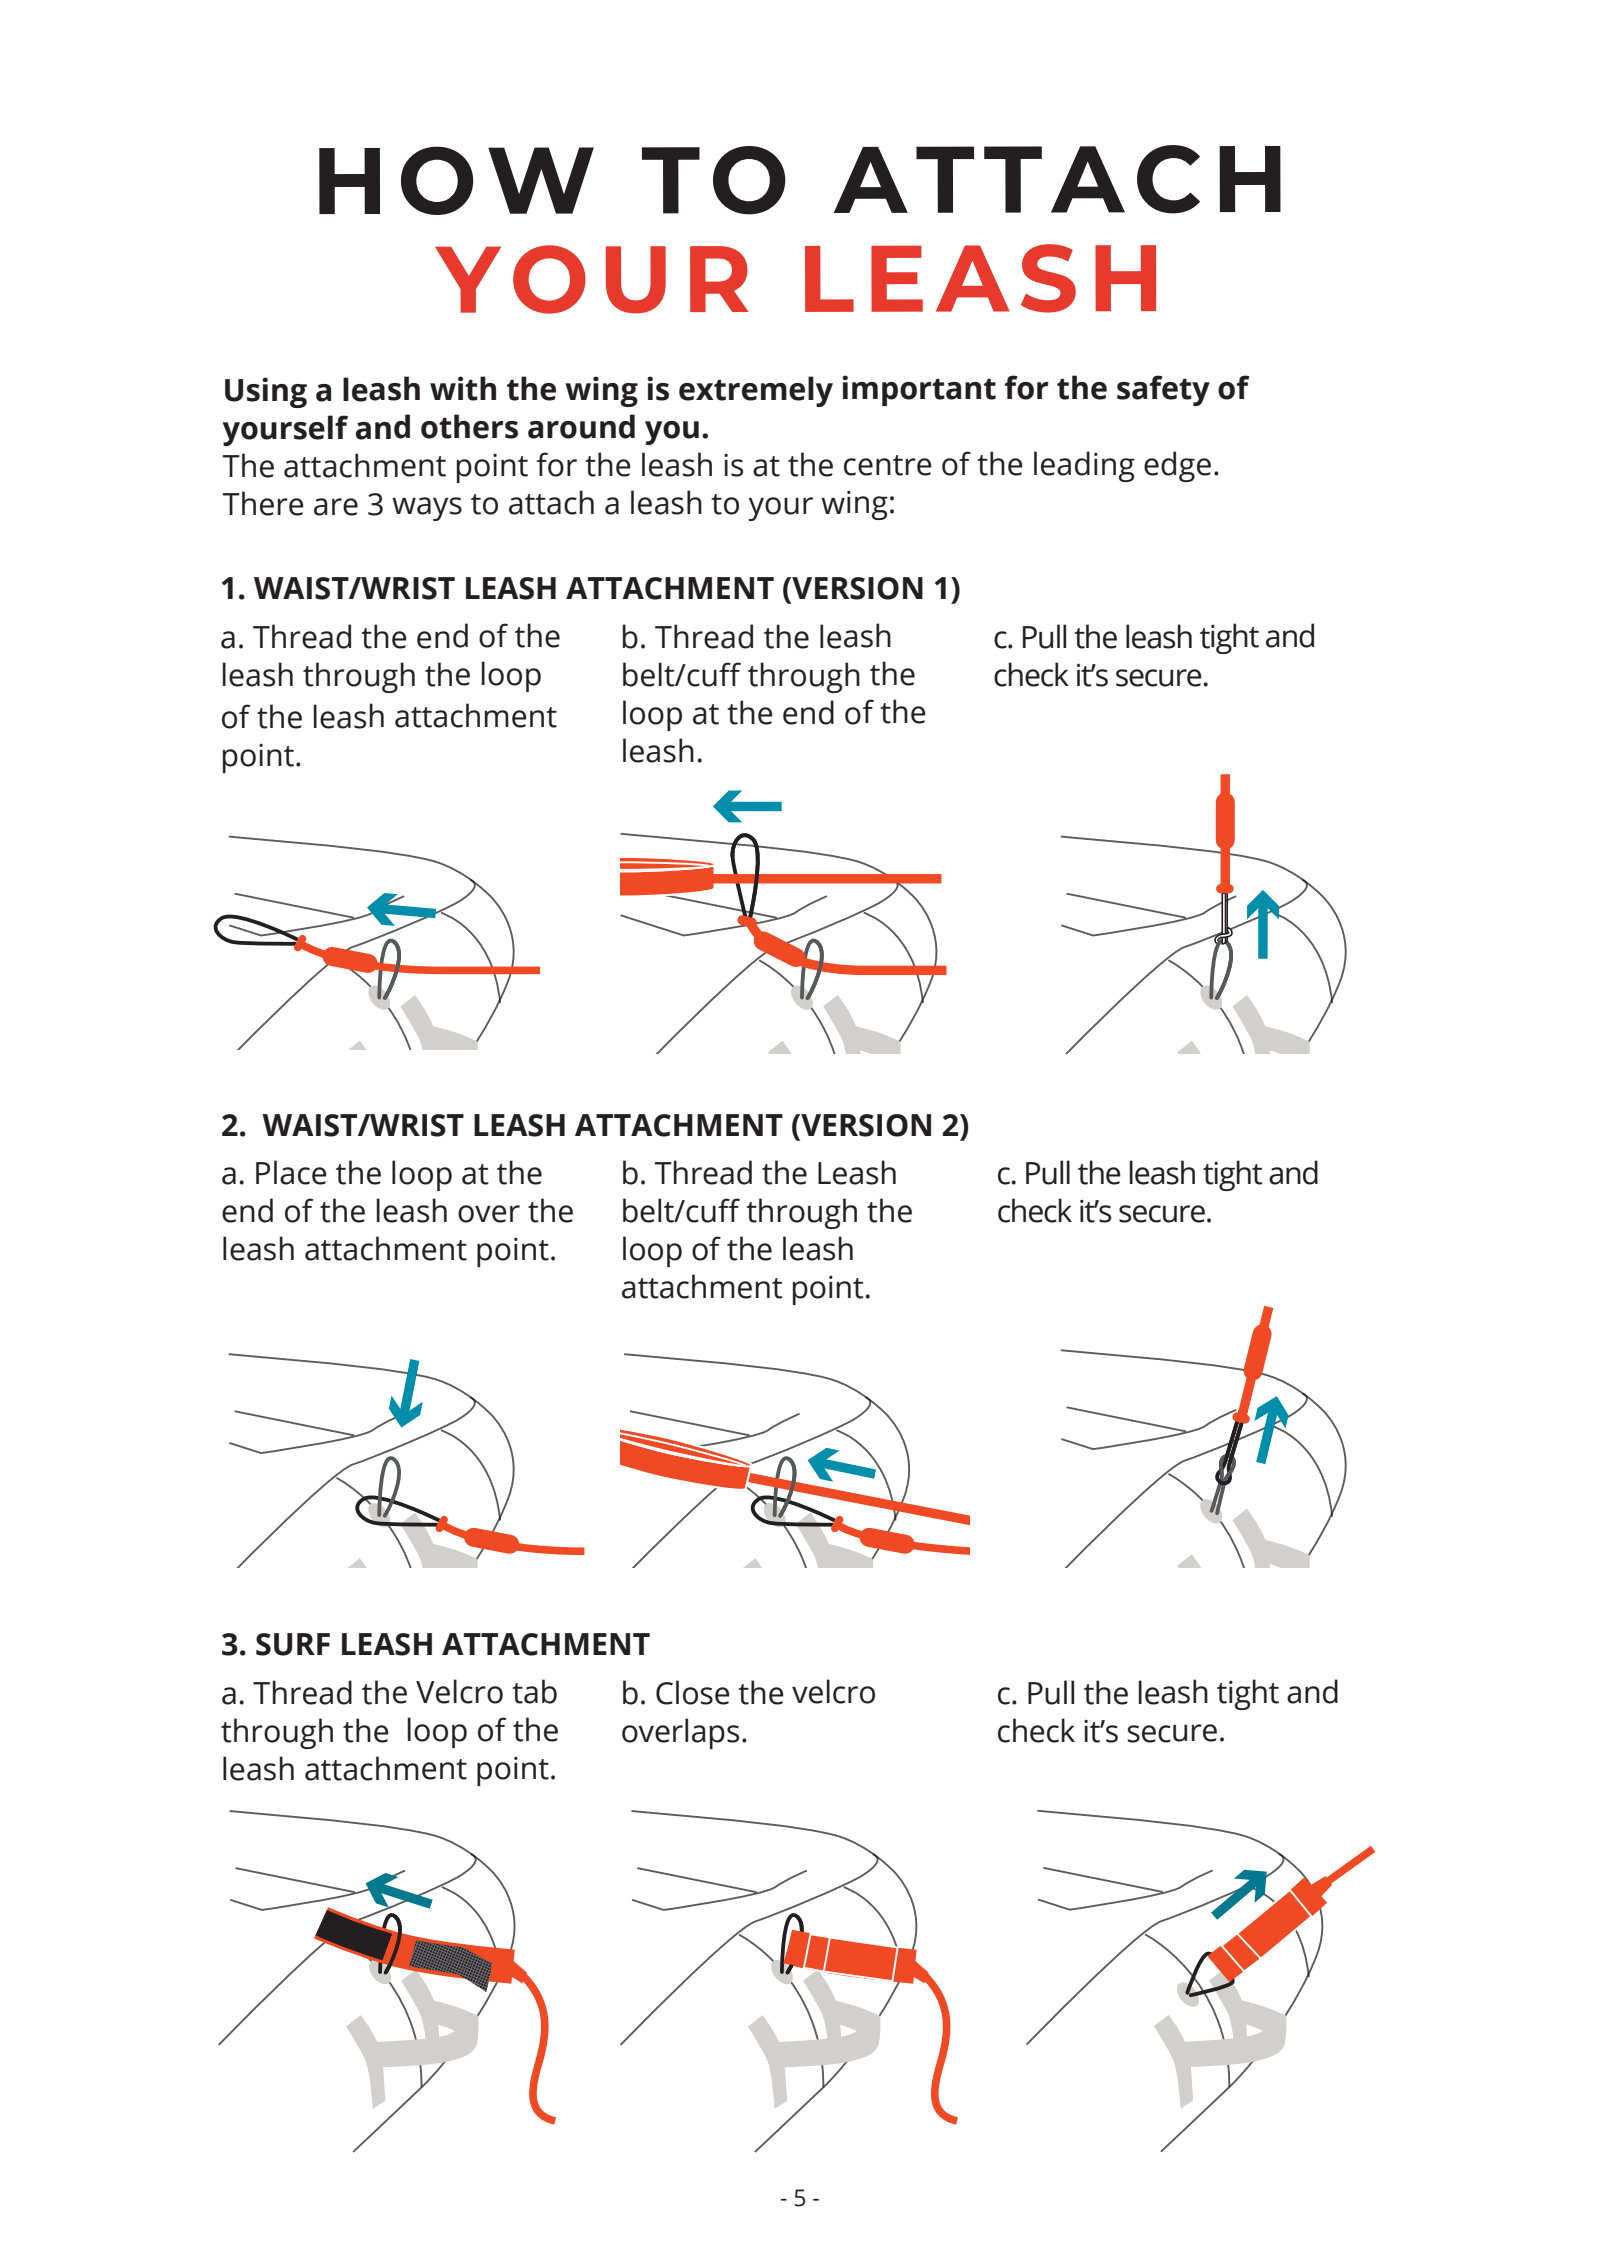
Starboard HQ's guide stresses attaching the leash and checking it's secure first. Attach it to the leash attachment point in the way that point is designed for, then pull on it to check it's properly secured.
Also check the spot where you'll lay out the wing for sharp stones or objects. Check the wind direction and place the leading edge and boom as shown in Starboard HQ's picture. You'll want to check the space around you for people and gear, too.
02. Check your wing's valves and pressure
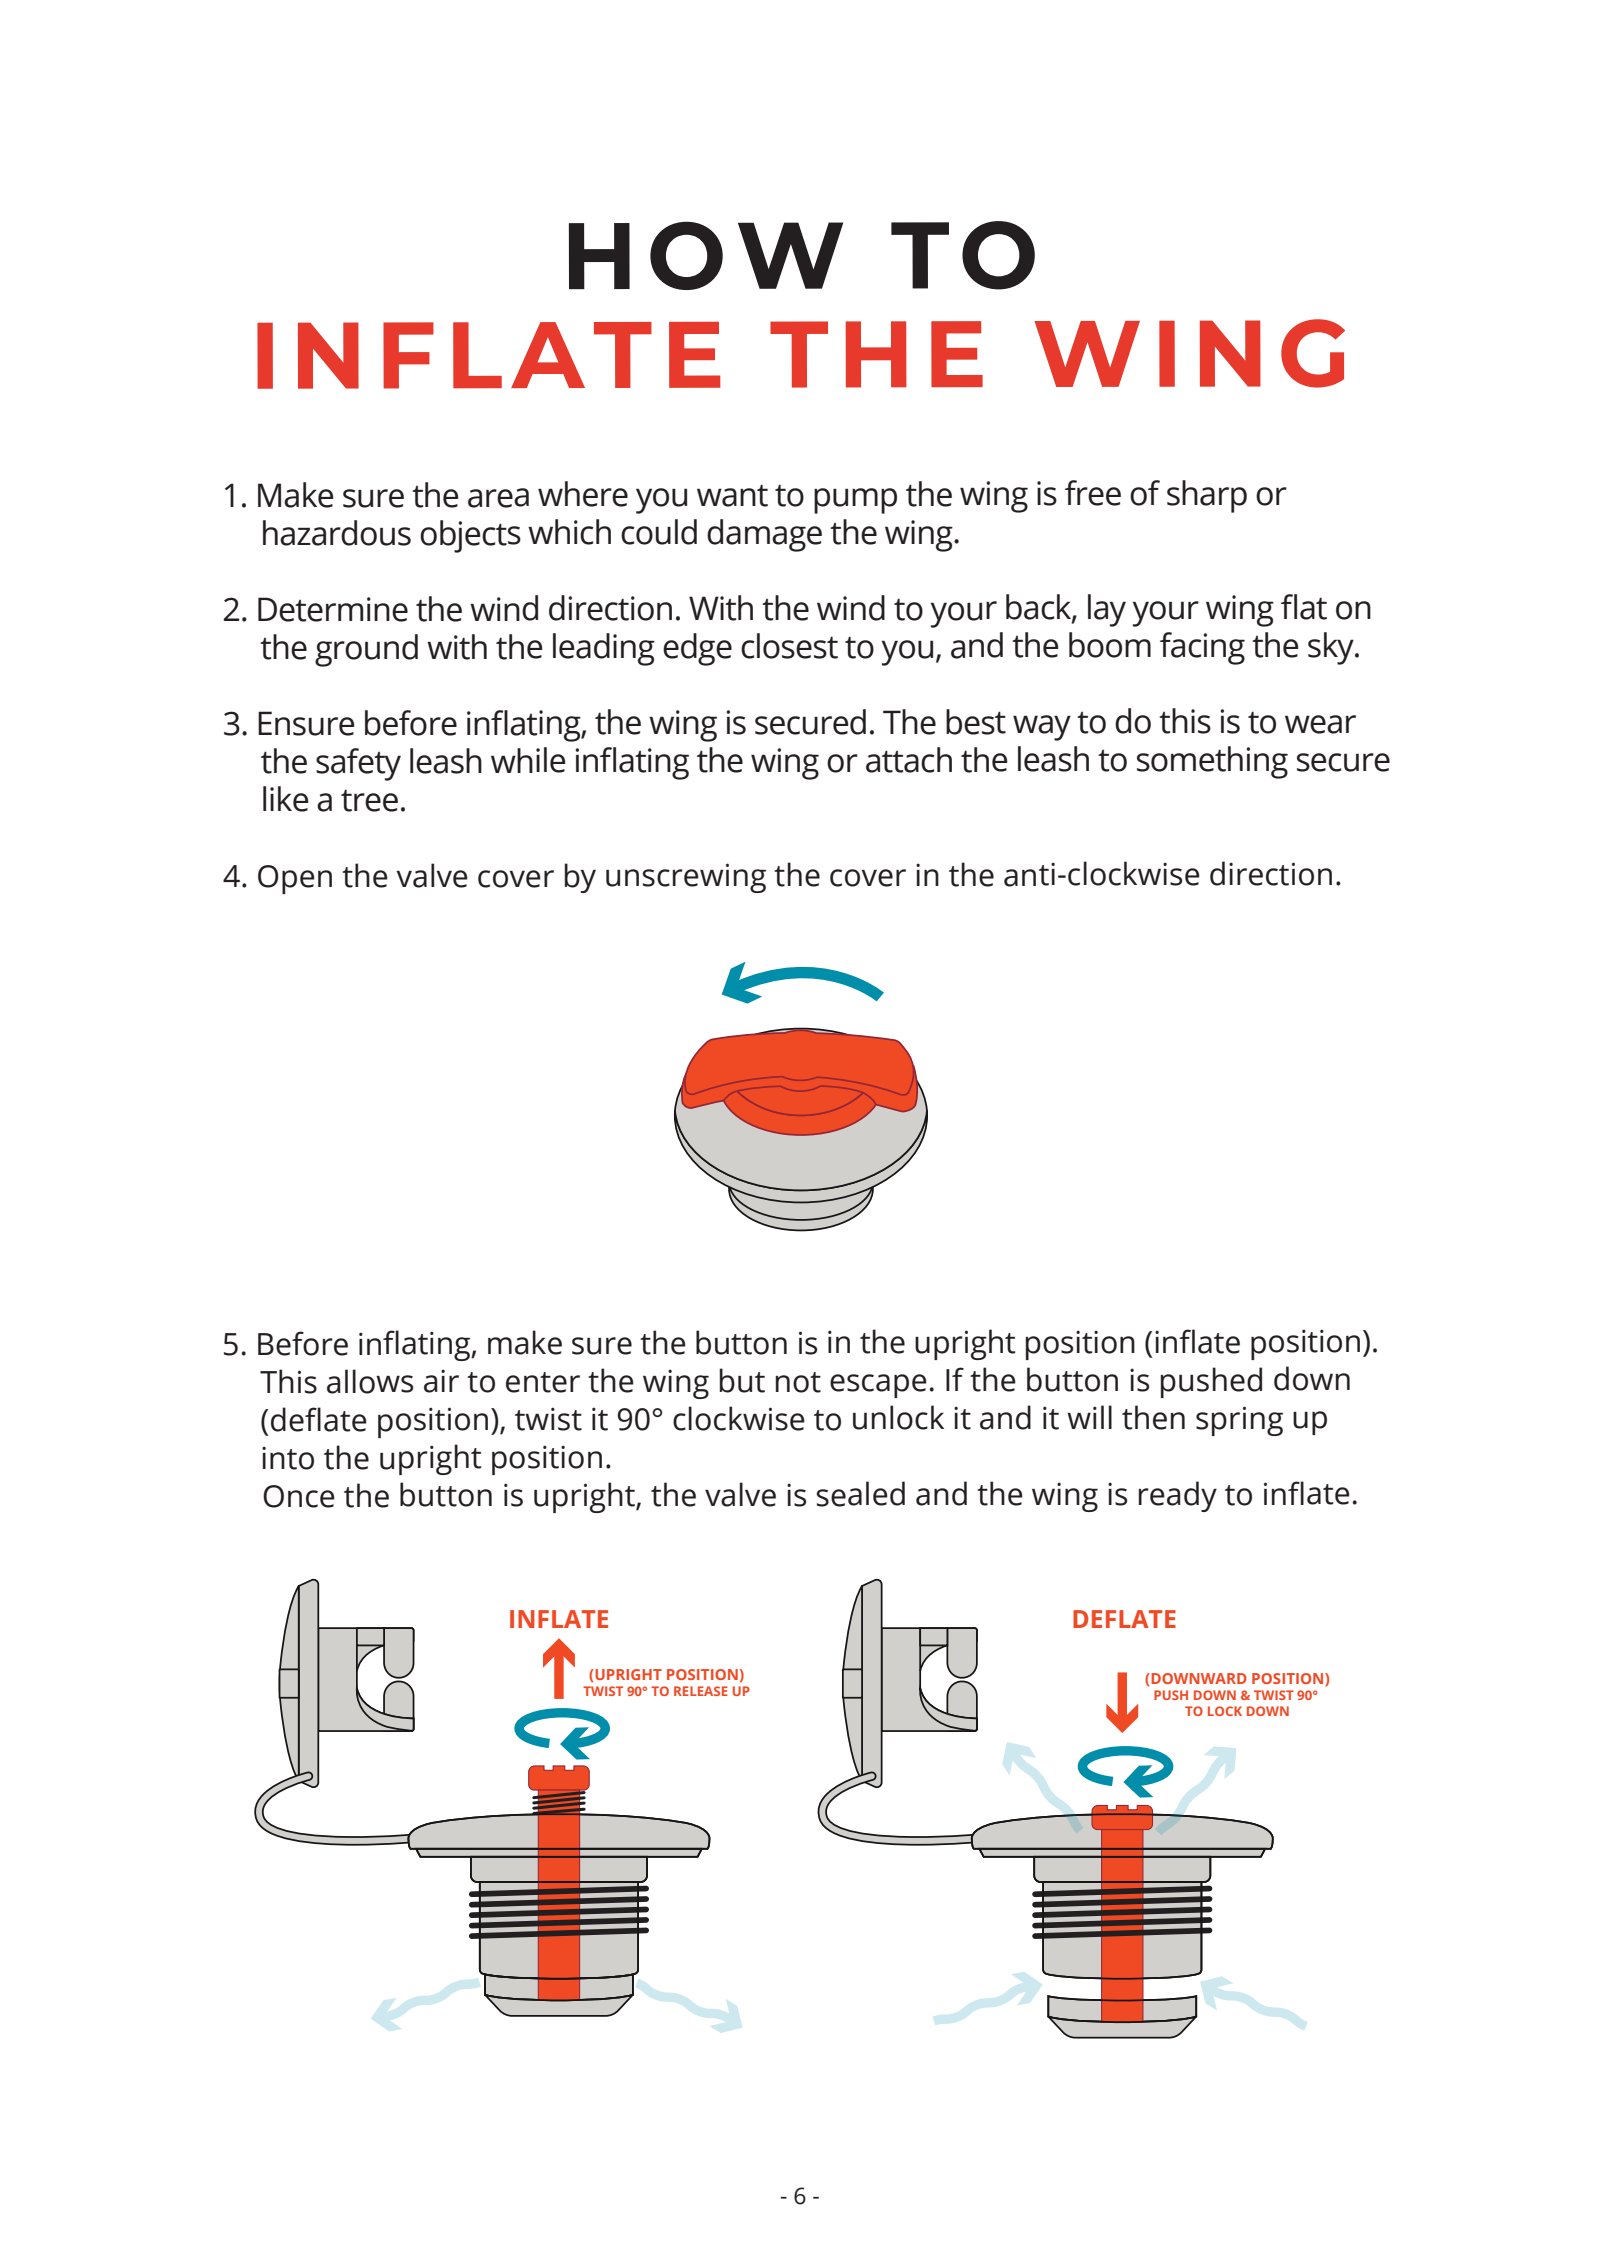
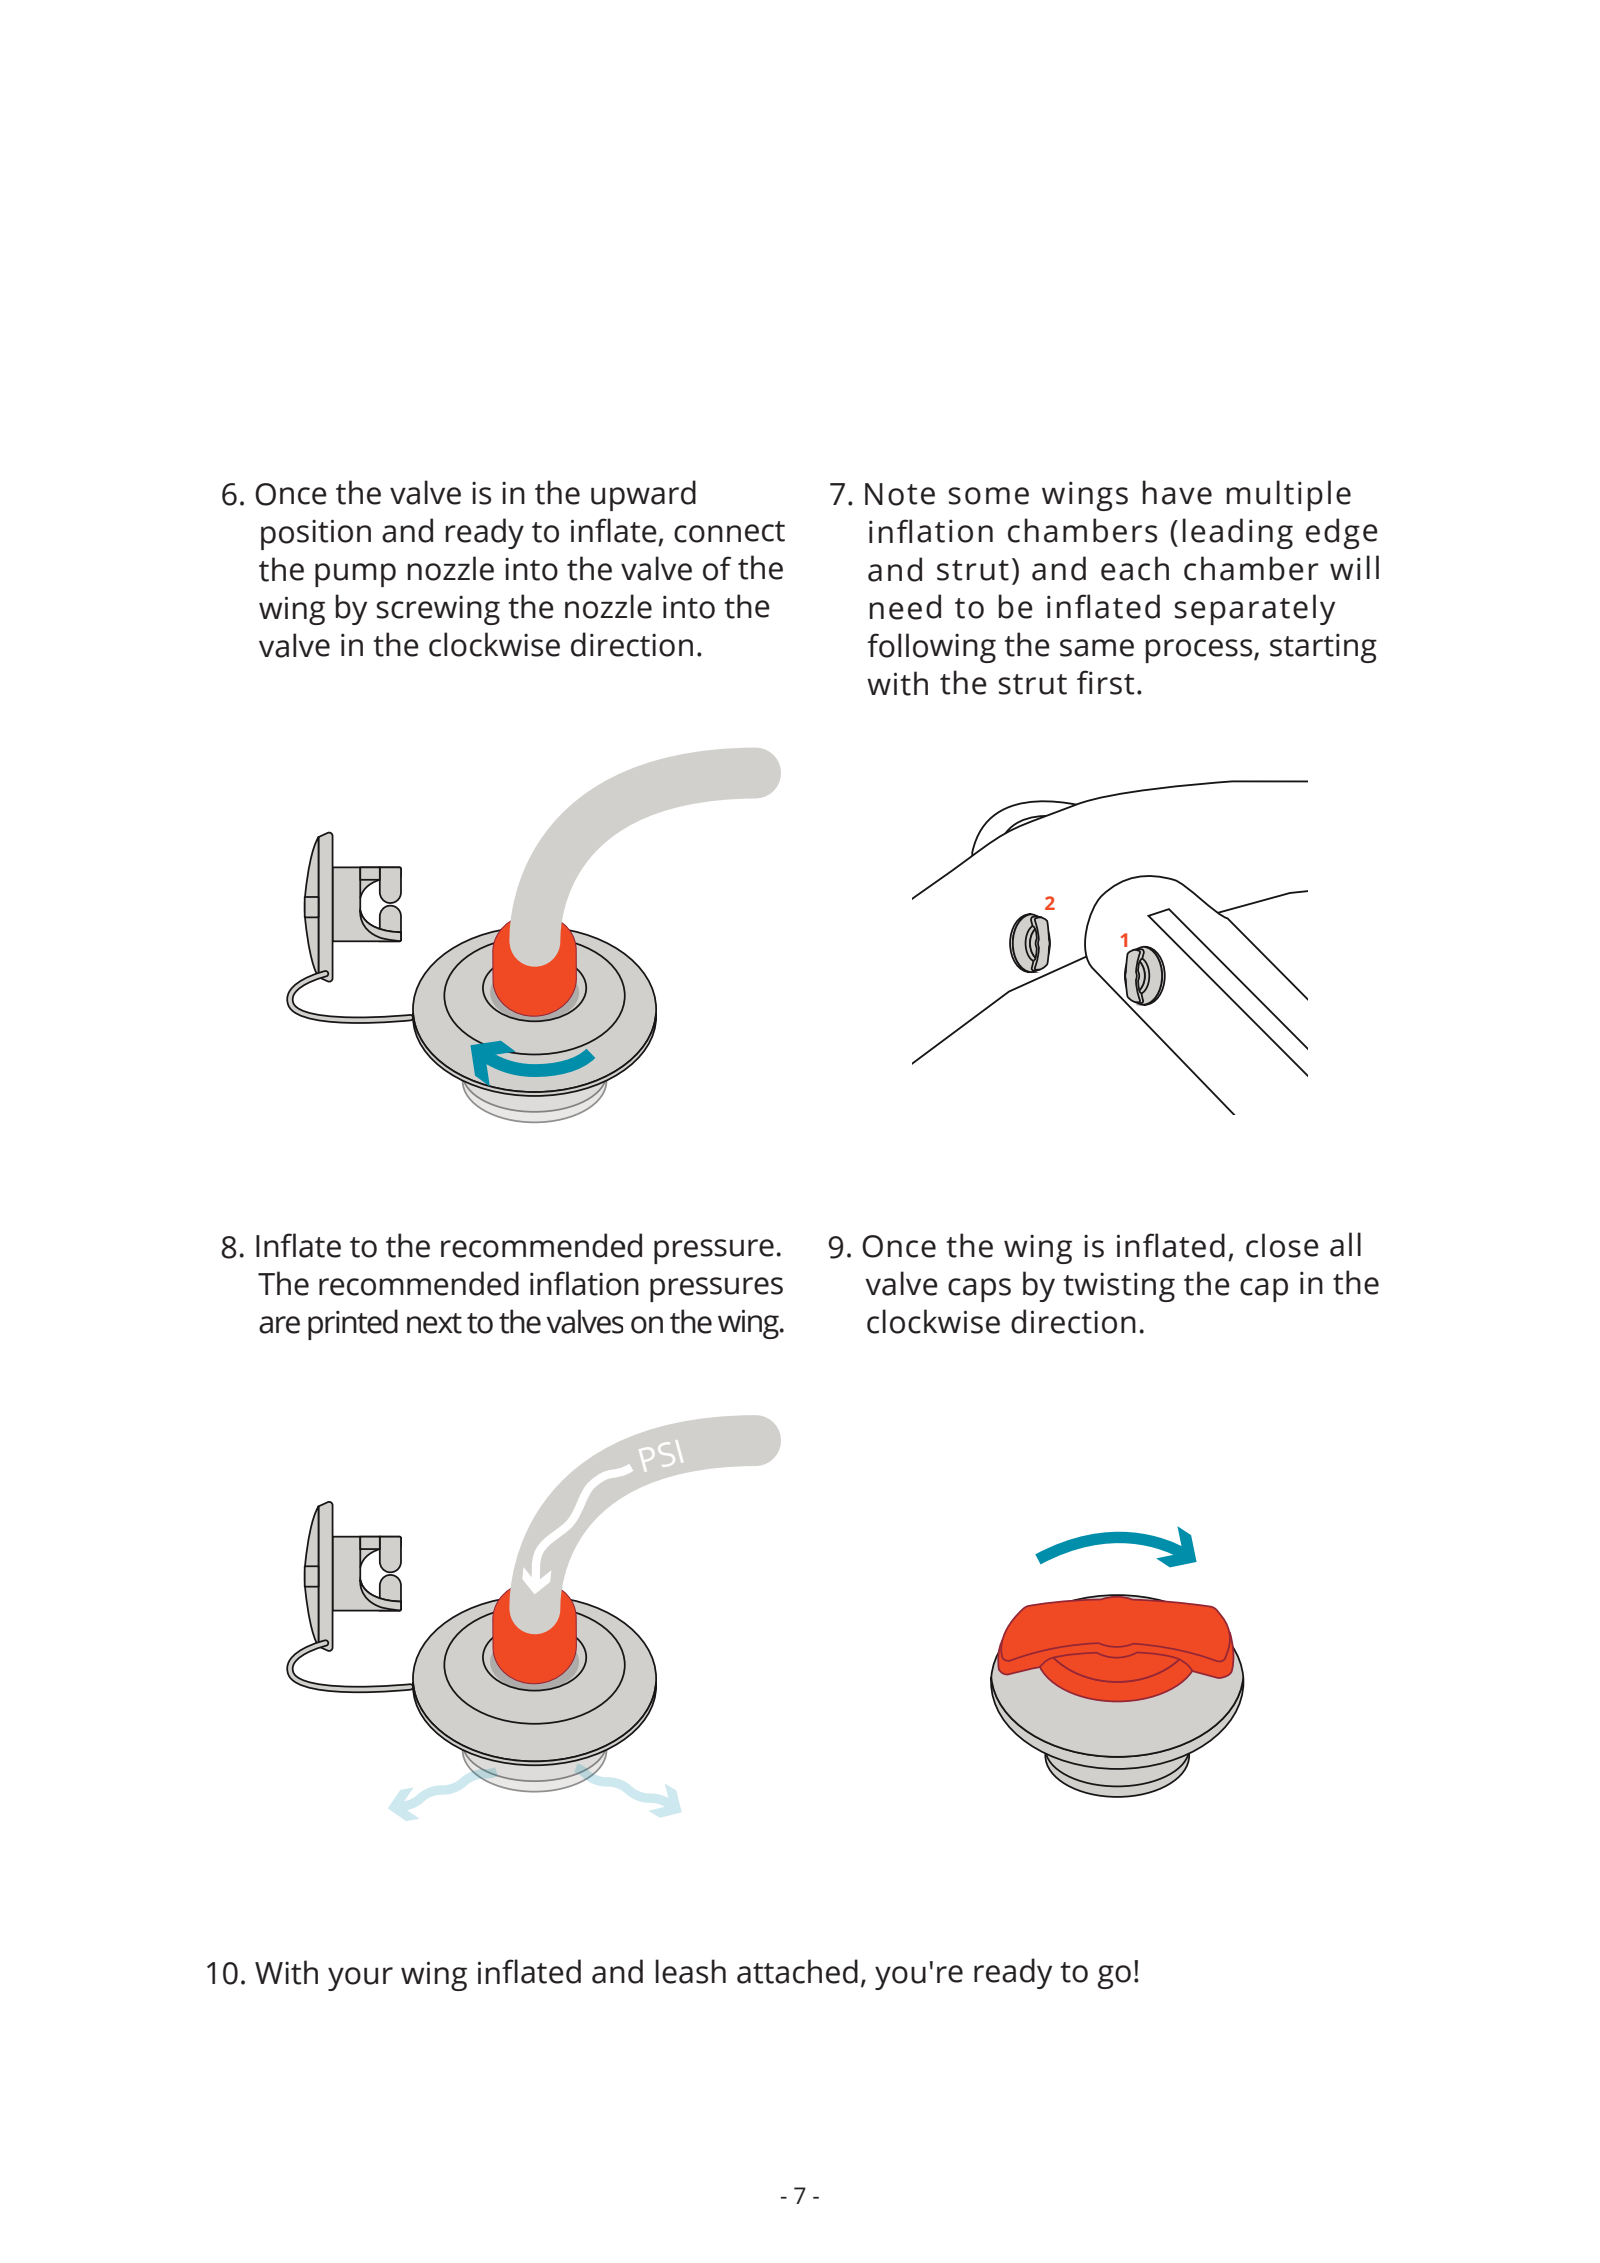
Before inflating, check that the valve is set to inflate. The recommended pressure to follow is the value printed next to the wing's valve. Avoid inflating every wing to one PSI.
The manual says that if the leading edge and strut are separate chambers, inflate each one, starting with the strut. This order applies to that construction. Check that your model works the same way before following it. Close the valve caps after inflating.
03. Let enough air out before folding
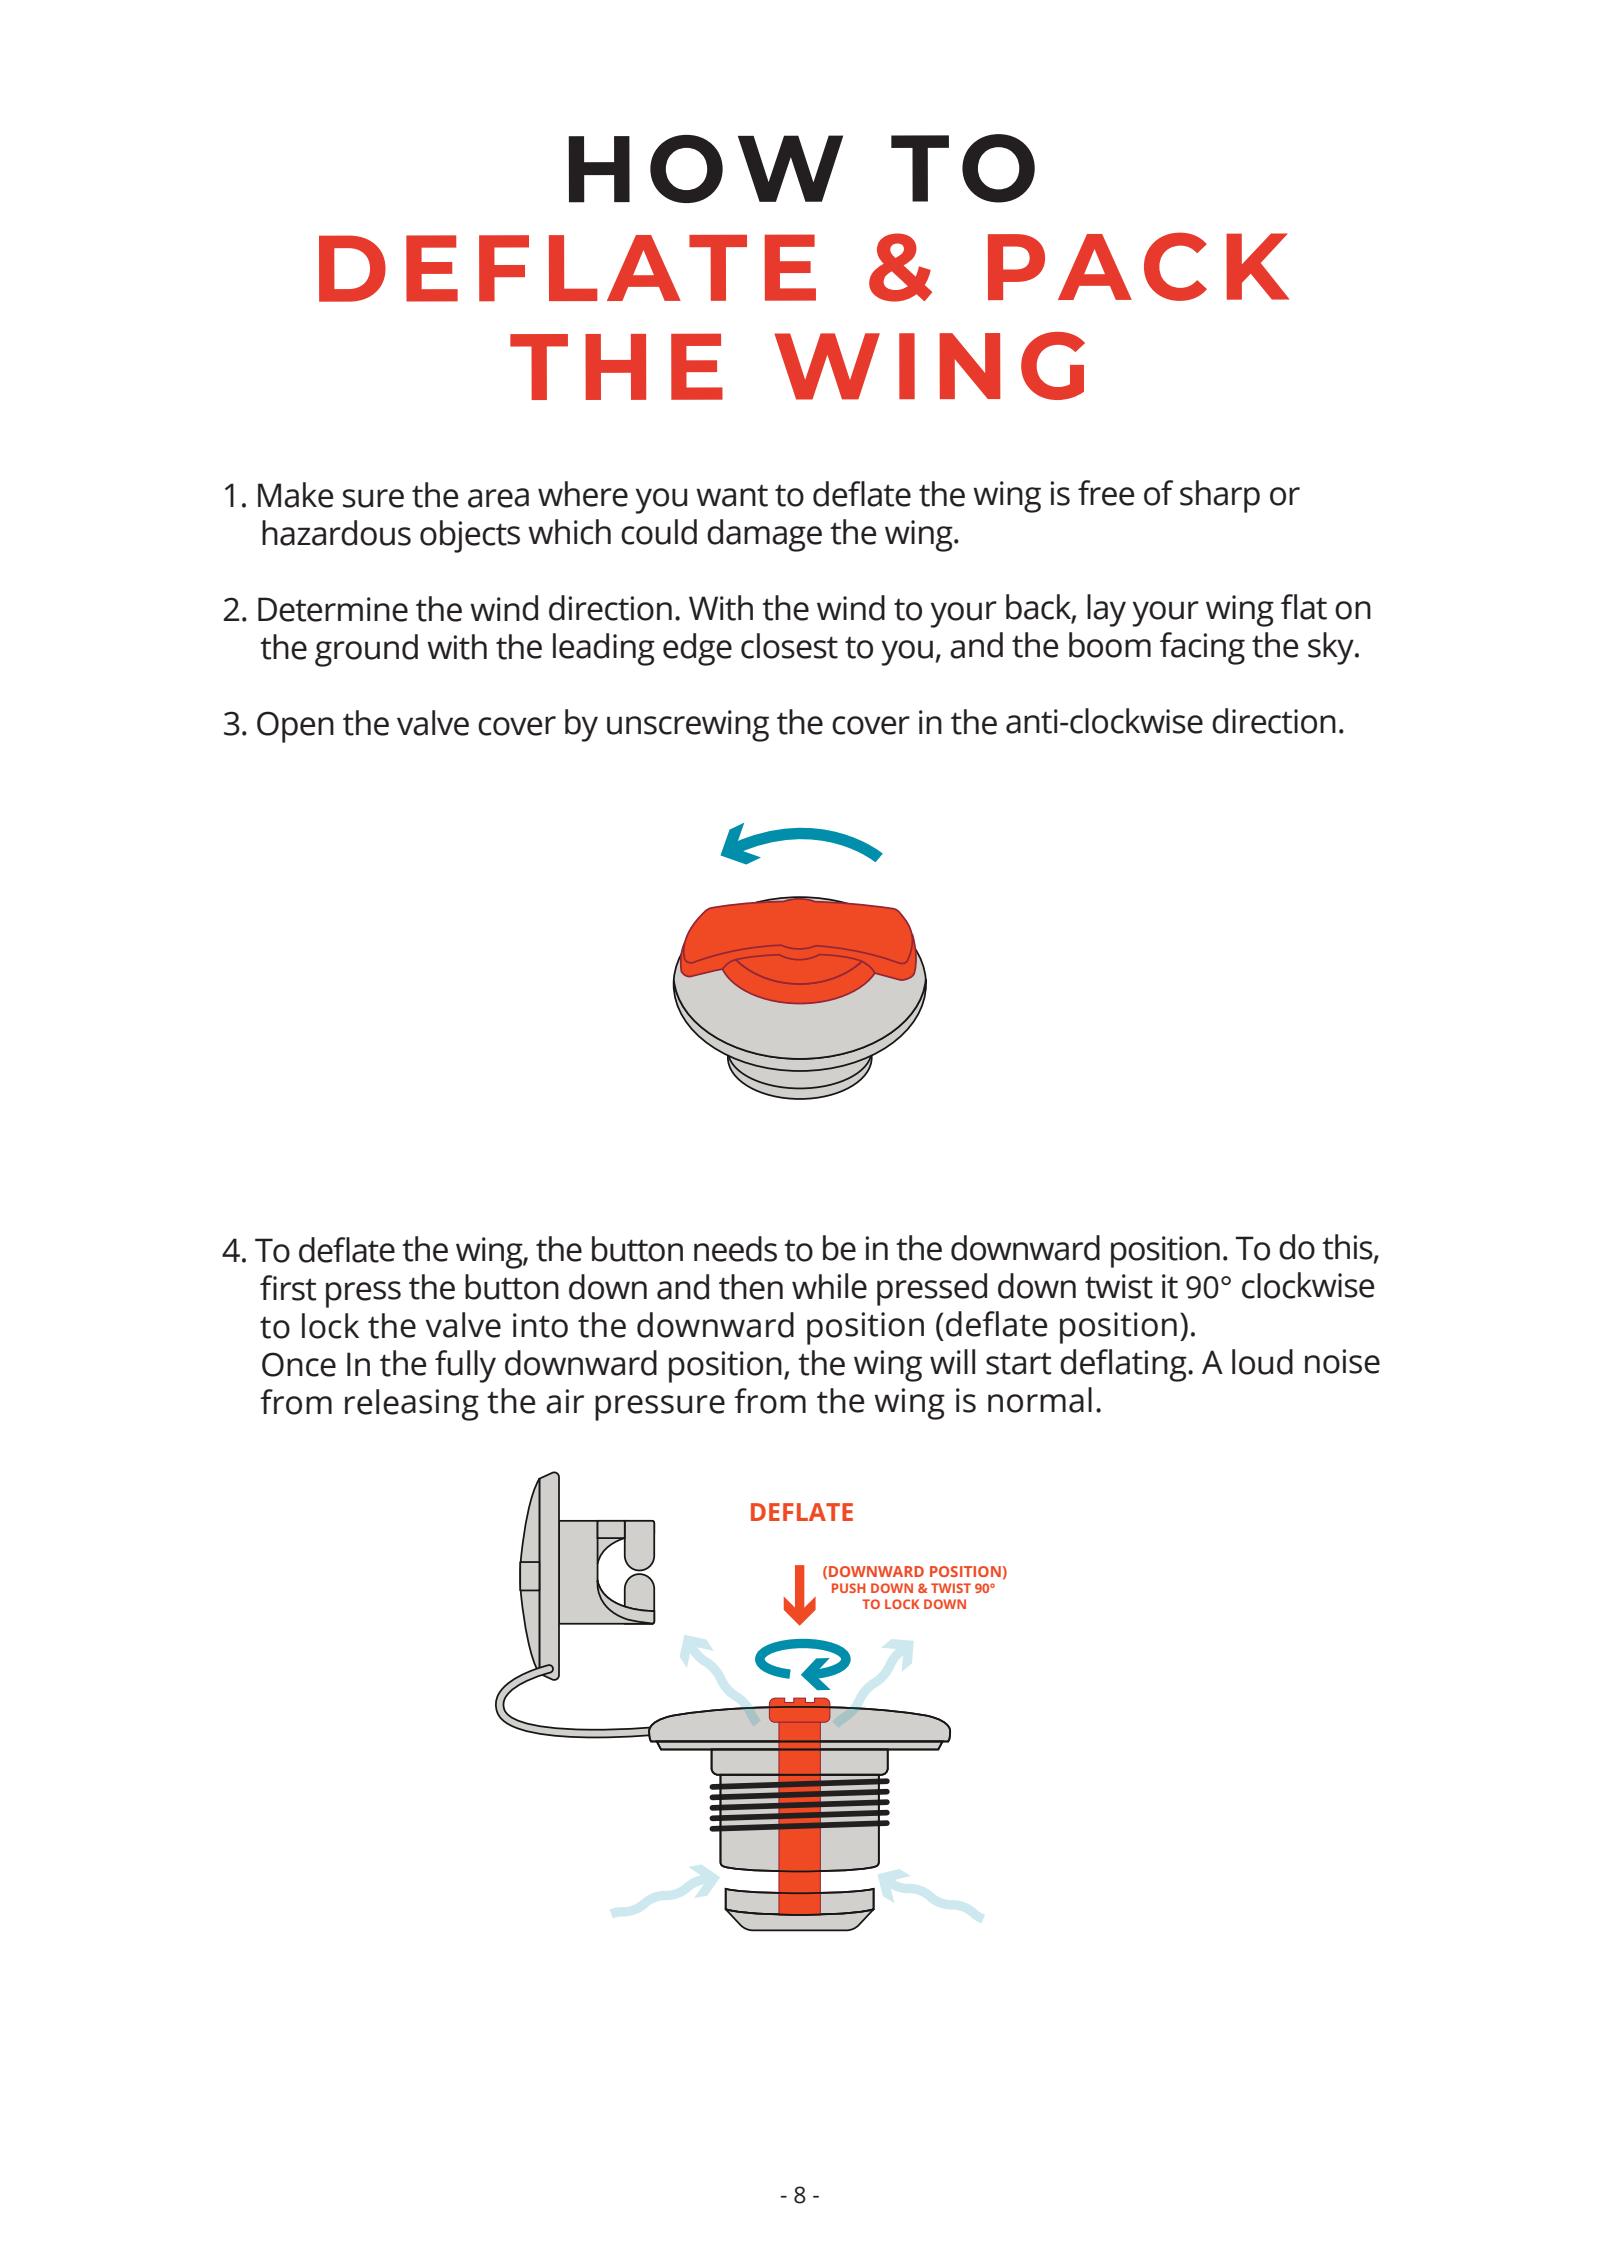
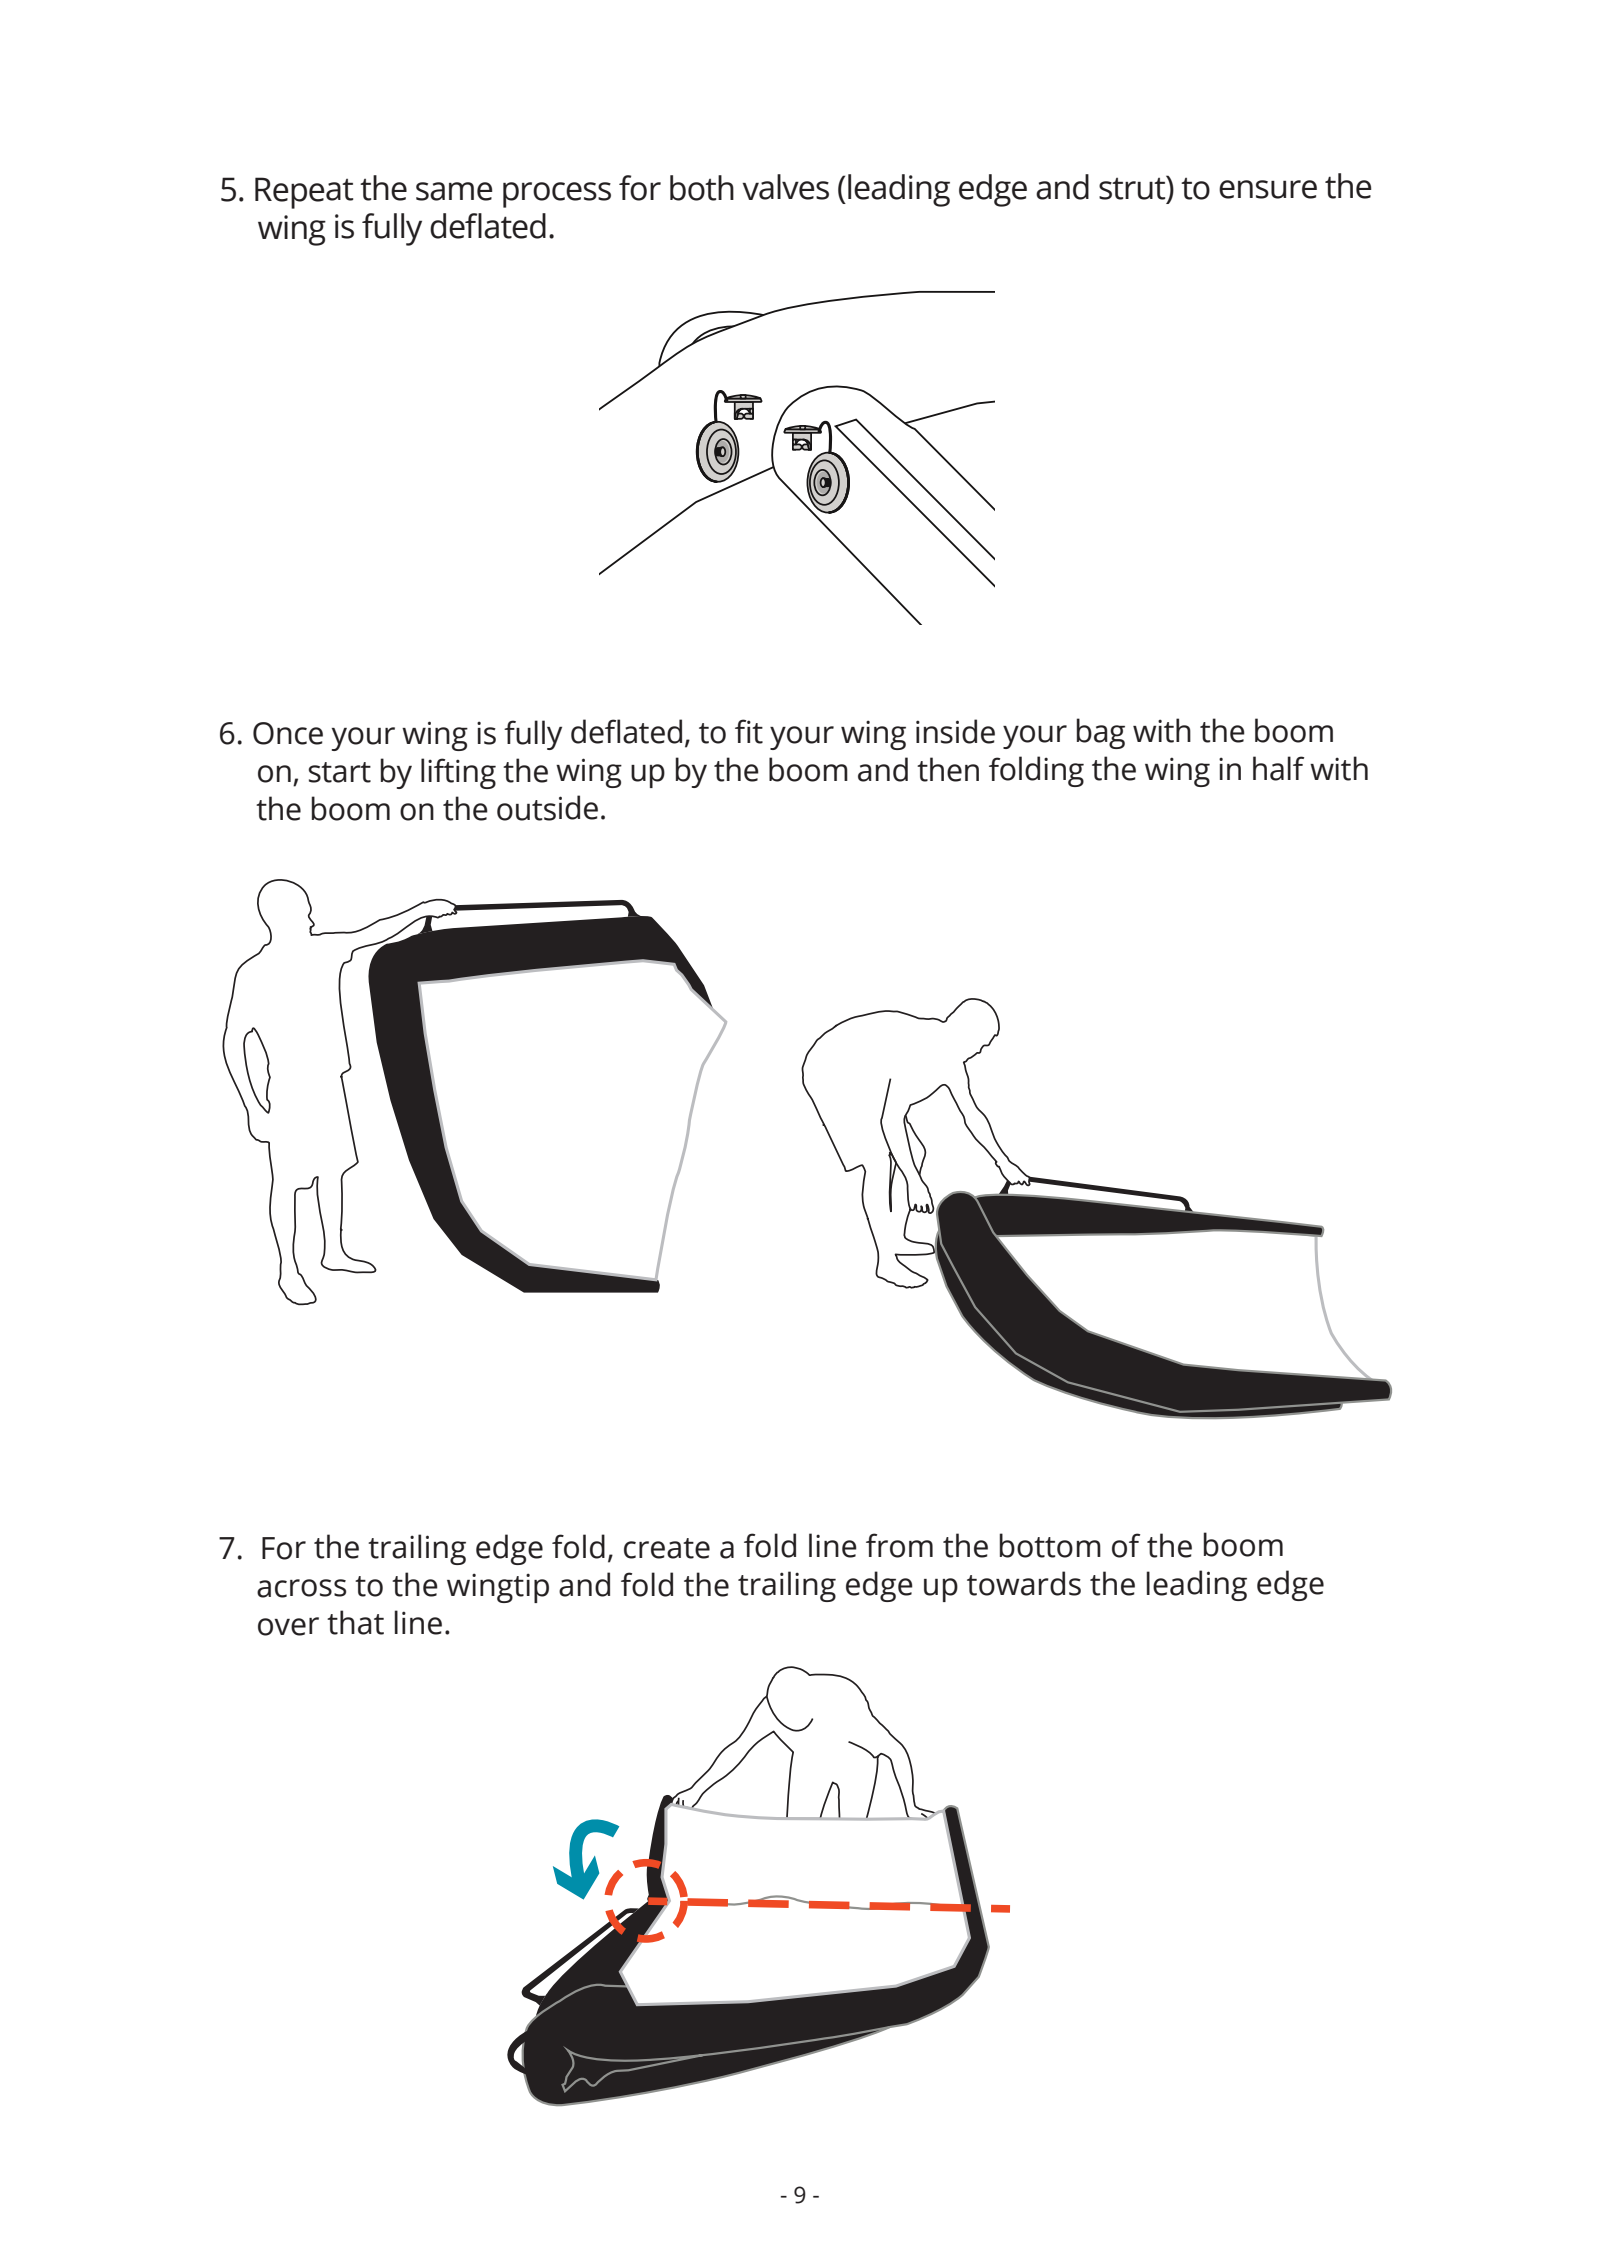
When packing up, again start by choosing a spot free of sharp objects. Let the air out in the way that suits the valve type, and if there are two valves, on the leading edge and the strut, check that both have been fully deflated.
Don't force the wing into its bag while air is still inside. For which way to turn the valves to close and open them, check your gear's manual first.
04. Boom on the outside, following the fold lines in the diagram
Starboard HQ's manual shows a folding method for storing the wing with the boom attached. You fold the wing in half with the boom on the outside, line up the fold lines of the trailing edge and leading edge, then fold from the wingtips toward the strut.
If the fold lines are confusing from the text alone, look at the pictures from pages 8–10 of the original below. Remember the last step: after use, dry it thoroughly before putting it in the bag. What matters is following the method that suits your wing's bag and construction.
Sources and scope
The illustrations are pages 5–10 of Starboard's Wing User Guide, with the original drawings, arrows and numbers; the explanation is Starboard Korea's commentary, which also brings in the drying advice from page 14. Check your product manual for your model's valves, chambers and boom setup as well.
The illustration is Starboard's original artwork; the explanation is Starboard Korea's editorial guide, translated into English here. Sources checked: 2026-09-08.